




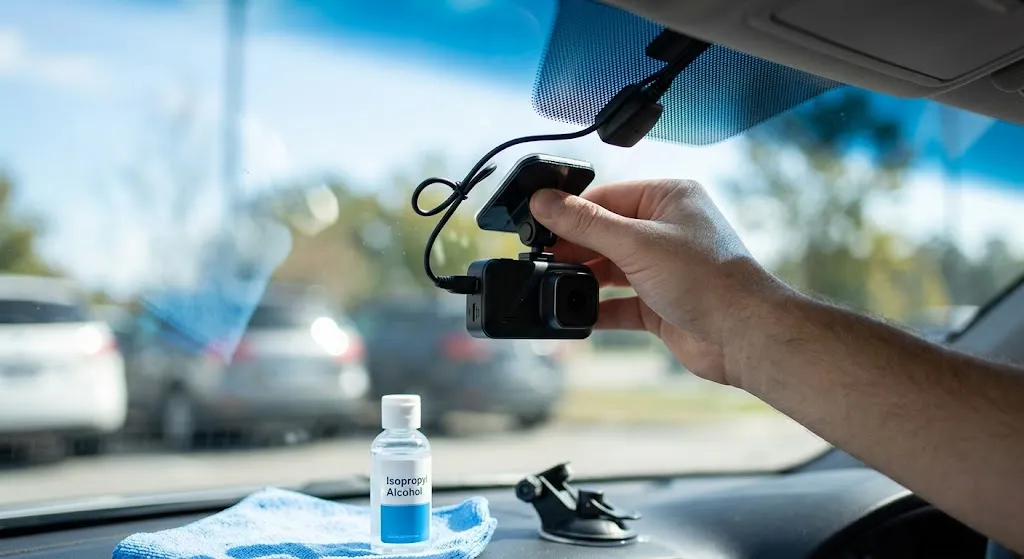
If your dash cam keeps falling off, the problem is usually the mounting surface, a worn suction cup, failed adhesive, heat or tension from the power cable.
It is a common problem in dash cam communities. In one DashCamTalk discussion about a camera repeatedly falling from the windscreen, drivers discuss cleaning the glass, replacing the adhesive and checking whether the mounting surface itself is causing the problem.
Before replacing your camera, try these fixes.
1. Clean the Windscreen and Mount
Start by removing dirt, grease and cleaner residue from the area where the camera is mounted.
For bare automotive glass, use a clean microfibre towel and a suitable glass cleaner. A small amount of isopropyl alcohol, also known as rubbing alcohol, can also help remove oily residue. Allow the windscreen to dry completely before reinstalling the mount.
Do not simply put a new sticky pad over an unclean surface. It may only stick to the residue rather than the glass.
For more on correct positioning and mounting, see Seven Smart Auto’s guide to installing a dash cam.
2. Check the Suction Cup
If you use a suction cup mount, inspect the rubber before repeatedly pushing it back onto the windscreen.
Wash away dust with warm water and check the edge for cracks, hardening or warping. Once dry, press it firmly against a clean, smooth area of glass and operate the locking mechanism if your mount has one.
If the rubber no longer sits flat, replacing the mount may be more reliable than continually reseating it.
This is also worth considering when choosing between different dash cam types and mounting setups.
3. Replace a Failed Adhesive Pad
If your adhesive pad has already peeled away, avoid repeatedly pressing the same pad back into place.
Remove the old adhesive and clean the surface before fitting fresh mounting tape that is suitable for the camera mount.
3M VHB tape is commonly mentioned by dash cam owners when replacing failed adhesive. In one Reddit discussion about a dash cam that kept falling off, users suggest VHB-style tape as an alternative when a suction mount repeatedly fails.
However, stronger tape will not compensate for poor preparation. 3M recommends clean, dry surfaces and firm application pressure when applying VHB tape. Check the manufacturer’s VHB tape application guidance before installation.
If your current mounting method simply does not suit your camera, Seven Smart Auto’s dash cam buying guide also explains the differences between suction and adhesive mounting options.
4. Consider Heat and Direct Sunlight
Does the camera stay attached during cooler weather but fall off after the car has been parked in the sun?
Extreme temperatures may be exposing an already weak adhesive bond or ageing suction mount.
Where possible:
- fit the mount when the glass is at a moderate temperature
- follow the adhesive manufacturer’s instructions
- avoid loading a newly fitted pad immediately
- use a sunshade when the vehicle is parked in direct sunlight
The same issue can affect a rear camera fitted to the rear window.
5. Check the Power Cable
A tight power cable can gradually pull on the camera.
Leave a small amount of slack close to the dash cam before routing the wire into the headliner. If the cable is constantly pulling down or sideways, vibration from normal driving may place extra strain on the mount.
Take additional care when routing cables around A-pillars and curtain airbags. A professional installer can conceal the wiring while avoiding interference with vehicle safety equipment.
6. Check Where the Dash Cam Is Mounted
Try to mount the camera against a smooth section of windscreen.
Placing an adhesive or suction mount partly over raised ceramic dots can reduce the amount of surface contact available.
The camera should also be positioned so it does not interfere with your view of the road. Transport for NSW advises that windscreen-mounted driver aids should be positioned to minimise obstruction to the driver’s field of view. See its guidance for windscreen-mounted devices.
When Should You Replace the Mount?
A new mount may be the simplest fix if:
- the suction rubber is cracked or warped
- the locking lever no longer holds firmly
- the bracket is loose or damaged
- fresh adhesive repeatedly separates
- the camera connection moves even when tightened
Check the bracket as well as the glass. Sometimes the adhesive remains securely attached, but the camera is separating from another part of the mount.
A reliable setup matters if you depend on recordings after an incident. Seven Smart Auto explains more about using dash cam footage as evidence in Australia.
Still Having Problems With Your Dash Cam Mount?
If your dash cam keeps falling off after cleaning the windscreen, replacing the adhesive and checking the cable and bracket, the installation position or mounting system may need to be changed.
Rather than repeatedly reattaching the same mount, Seven Smart Auto provides professional dash cam installation in Sydney, with secure camera positioning and concealed cable routing.